People directory pulls information from SharePoint People Search which is connected to Active Directory (AD) / Entra ID.

To add the web part to any page, simply look for People Directory as shown below:

Hiding users from directory
--If your user is no longer with the organization
See these steps People Directory doesn't display some accounts / or displays disabled users
--If the user is a system account you don't want to see
If the user is a system account, and you’d like to hide those systems accounts, follow these steps.
System accounts usually don’t have a Department field set, so to hide them, simply go to web part properties and enable “Hide users without a Department set” toggle to on:

As you can see there are a few more exclusion toggles there for you to experiment.
--Additional filtering options
Step 1: Assign Users to a Hidden Department (Wait Time: Up to 24 Hours)
The easiest way to hide users is by assigning them to a specific department and filtering that department out.
Common Department Names for Hidden Users
- “System Accounts”
- “Meeting Rooms”
- “Hidden”
- “Service Accounts”
- “Test Users”
Important:
- Avoid special characters in department names (e.g., use “Rooms and Resources” instead of “Rooms & Resources”).
- Changes can take up to 24 hours to sync with SharePoint.
How to Assign a Department
- Go to either:
- Azure AD (https://portal.azure.com/)
- or Microsoft 365 Admin Center (https://admin.microsoft.com/).
You need to log in as Admin to do this.
- Find the user and update their Department field.
- Save changes and wait up to 24 hours for the department to sync with SharePoint.
Step 2: Filter Out Hidden Users in the People Directory
Once the department is assigned and fully synced with SharePoint, you can apply a KQL (Keyword Query Language) filter to exclude those users from appearing.
Basic Example: Hide Users in a Specific Department
To hide all users in the “Hidden” department, use this syntax:
AND Department <> 'Hidden'
Hide Multiple Departments
To hide users from multiple departments and those with a specific last name:
AND Department <> 'System' AND Department <> 'Admin'
Hide All Departments Except Select Few
To hide users from all departments and only show specific chosen departments, use this syntax:
Department:"Corporate" OR Department:"Human Resources"
Use different KQL filters to control which users appear.
 More Examples
| Scenario | KQL Query |
|---|---|
| Only show users with a specific email domain | AND (WorkEmail: "*@company.com") |
| Hide a specific username | AND NOT (PreferredName: "Boardroom") |
| Hide multiple usernames | AND NOT (PreferredName: "Boardroom") AND NOT (PreferredName: "TestUser") |
| Hide users with a certain Job Title | AND NOT (JobTitle: "Contractor") |
| Hide accounts with a specific prefix | NOT (AccountName: "svc*") |
| Only include users from a specific department | AND (Department="Sales" OR Department="Marketing") |
| Exclude users who don’t have an email address | AND WorkEmail<>"" |
Step 3: Set Filter in Origami People Directory
Once you have constructed a filter in step 2, go to Origami People Directory web part propertries and paste your filter inside this textbox:

Click Apply to save your changes.
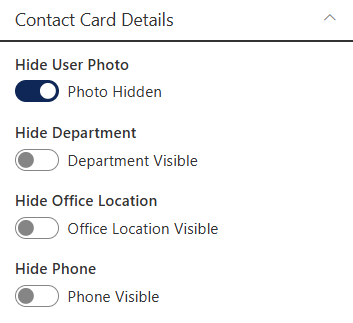
Show/hide profile card details
You can choose what shows on the contact card for each user.
To do that:
- Edit the People Directory web part properties
- Go to Contact Card Details and select items you’d like to show or hide:
When ready, click Apply in web part properties.
---Show a custom property
Before you can show a custom property, you need to ensure you have created it (if this is a new property). To learn how to create a custom property, see the section below: For Admins → Creating a custom property to show on a contact card.
If you already have a custom property, like an Assistant, you can add it to the People Directory web part properties, as shown below:

-[Custom User Profile Field] refers to exact name of a managed property that will be displayed on a contact card for each user. Follow the section For Admins → Creating a custom property to show on a contact card to see how to set this up.
-[Label for Custom Field] is a descriptive label to show next to a field.
For Admins
Choose where employee pictures come from
You can choose to pull employee pictures from Azure AD or SharePoint User Profile.
In the People Directory web part properties select your preference, as shown here:

NOTE: If you want the People Directory to show profile photos from Microsoft 365, the required Microsoft Graph permissions must be approved by your Microsoft 365 administrator.
The setup steps are covered here: Enable Group Targeting for Origami Web Parts
NOTE: If you selected SharePoint user profile as a source for your photos but the photos don’t show up, check out these steps for troubleshooting: User profile pictures are not showing in People Directory but are showing in Azure AD
Adding custom refiners
As an administrator, you can choose which refiners your employees can refine by.
Default refiners are Department and Location, but you can create a custom refiner (in our example here “Division” refiner) that will show like this:

The process of creating custom refiners takes time due to Microsoft dependencies. Here are the major steps:
Part 1 - Create a custom user profile property
In our example, if we want to refine employees by Division, we need to ensure “Division” is an existing User Profile Property. Here is how to create it (unless one is already created).
- Navigate to SharePoint Admin Center in your Microsoft 365 tenant
- In the left hand side navigation, click More features

- Under User Profiles click the Open button.
- A new window will open, click [Manage user properties]

- If you already have a new User Profile Property, copy it’s name. If you need to create a new property, use the New property button to create a new property.

- Give your property necessary attributes, but be sure to set the following attributes as shown below:


If your property doesn’t have attributes above, it will not be picked up in the next sequence
Part 2 - Populate user profile property
Before our new property can be used, it needs to be populated with data for at least several users. Here is how to do that:
- Navigate to SharePoint Admin Center in your Microsoft 365 tenant
- In the left hand side navigation, click More features
- Under User Profiles click the Open button.
- On the new page, click Manage user profiles

- Find any profile you’d like to populate and Edit it
- Scroll down to a custom profile property you created in Part 1 and set it’s value as needed. In our case, we set Division to “Americas”
- Save the profile for a given user and repeat steps 5-7 for as many users as necessary
Part 3 - Wait 24-48 hours for SharePoint to pick up changes
SharePoint crawling engine will pick up changes within a few days as per Microsoft.
Part 4 - Set the user profile property to be picked up by search
Next, our custom property needs to be associated with a refinable property in SharePoint Search Service Application. Here is how to do it:
- Navigate to SharePoint Admin Center in your Microsoft 365 tenant
- In the left hand side navigation, click More features
- Under Search click the Open button.
- Click [Manage Search Schema]
- Search for the [RefinableString] managed property that doesn’t have any other property associated with it yet.
- Edit the property you selected by clicking Edit/Map Property as shown below
- Scroll down to the bottom of the page and click Add a Mapping button:
- Search for a property name you created in Part 1 (in our case “Division”).
- Click OK at the bottom of the page to save changes.


Part 5 - Configure Origami People Directory
Open the Origami People Directory web part and configure the refiners:
-
Assign chosen refiners as follows:
We have set RefinableString1 as one of the refiners that holds our Division property which was mapped in Part 4 -
Set the display labels with a friendly text you’d like users to see when refining.

Creating a custom property to show on a contact card
If you already have a custom property, like an Assistant, you can add it to the People Directory web part properties, as shown below:
Here is how to find an existing property or create a new/unique one.
Part 1 - Create a custom user profile property
In our example, we will create a property called “Division”–this is a new property never been created before.
- Navigate to SharePoint Admin Center in your Microsoft 365 tenant
- In the left hand side navigation, click More features
- Under User Profiles click the Open button.
- A new window will open, click [Manage user properties]
- If you already have a new User Profile Property, copy it’s name. If you need to create a new property, use the New property button to create a new property.
- Give your property necessary attributes, but be sure to set the following attributes as shown below:
If your property doesn’t have attributes above, it will not be picked up in the next sequence
Part 2 - Populate user profile property
Before our new property can be used, it needs to be populated with data for at least several users. Here is how to do that:
- Navigate to SharePoint Admin Center in your Microsoft 365 tenant
- In the left hand side navigation, click More features
- Under User Profiles click the Open button.
- On the new page, click Manage user profiles
- Find any profile you’d like to populate and Edit it
- Scroll down to a custom profile property you created in Part 1 and set it’s value as needed. In our case, we set Division to “Americas”
- Save the profile for a given user and repeat steps 5-7 for as many users as necessary
Part 3 - Wait 24-48 hours for SharePoint to pick up changes
SharePoint crawling engine will pick up changes within a few days as per Microsoft.
Part 4 - Set the user profile property to be picked up by search
Next, we need to create a custom property in SharePoint Search Service Application which will take its data from User Profile. Here is how to do it:
-
Navigate to SharePoint Admin Center in your Microsoft 365 tenant
-
In the left hand side navigation, click More features
-
Under Search click the Open button.
-
Click [Manage Search Schema]
-
Click the New Managed Property button

-
Set the property values as follows:
Name → Enter a meaningful name (e.g.,Division).
Type → Select Text.
Search Settings → Set the following:
 Searchable – Allows the property to be included in search queries.
Queryable – Allows the property to be searchable using KQL.
Retrievable – Allows the property to appear in search results.
 Refinable – Leave unchecked since you don’t want it to be a refiner.
Sortable – Optional based on whether sorting is needed. -
Map the property to user profile property created in Part 1.
-
Scroll down to Mappings to crawled properties
-
Click Add a Mapping.

-
Search for the custom user profile property you created in Part 1 (example ,
Division). -
Select it from the list (should be something like People:Division).
-
Click Ok to map it.
-
It should show in the textbox of mapped properties, like this:

-
Click Ok at the bottom of the page to save the managed property.
![]() Search schema changes will usually propagate within 1 hour.
Search schema changes will usually propagate within 1 hour.
Part 5 - Configure Origami People Directory
Now, you can go to the Origami People Directory web part and configure the custom property as follows under the Contact Card Details section:

Your custom property should now be showing for users for whom you set the property value in Part 2, as shown below:

Known Issues
People Directory keeps refreshing few times when the page is first loaded
Some information used by People Directory (such as photos) is taken from Microsoft Graph, so you will need to allow People Directory to connect to Graph.
Here is how to do that:
Grant People Directory permission to read user photos and profile information
Office Location not showing?
You might see your Office Location refiner not showing as illustrated below or some locations are missing:

Follow these steps to set your directory to start Using location from Entra ID as a location refiner
Custom refiners or custom properties not showing?
If you have an existing User Profile Property (such as Division) and want to display it in the People Directory (as a refiner or on the contact card), but it’s not appearing, the issue may be due to how SharePoint handles search indexing.
Why This Happens
- When you create and populate a User Profile Property, SharePoint search only refreshes the connected Search Properties when the User Profile itself is updated.
- If the User Profile Property was created and populated some time ago, and you’ve only recently created a Search Property for it, SharePoint may not recognize the need to update the search index with the existing value.
Solution
To resolve this, you need to trigger a change in the User Profile to force SharePoint search to update the data. Here’s how:
- Manually update the property value for a single user profile.
- Wait up to 24 hours for SharePoint search to index the updated data.
- If the update works, but you have multiple user profiles to update, you can automate the process using PowerShell:
- Write a PowerShell script to make a minor change (e.g., adding and removing a character) to the relevant user profile properties.
- This will trigger a search update for all affected profiles.
Best Practice
- Always test the update on one user profile first to confirm that the search index picks up the change before scaling it with PowerShell.
- After the search index updates, the User Profile Property should appear in the People Directory as expected.
Stale user profile data?
Refreshing stale user profile data in SharePoint
If a user’s title or profile information is out of date in SharePoint, a small profile update can help trigger SharePoint search to pick up the latest changes.
This is done in the SharePoint User Profile Service Application in the SharePoint Admin Center, not in Entra ID.
Steps
-
Log in to the SharePoint Admin Center.
-
Open the User Profile Service Application.
-
Find the user whose profile is showing stale information.
-
Make a small change to the profile, for example set the About Me field to
N/A. -
Save the profile.
-
Repeat the same steps for any other affected users.
-
Wait up to 24 hours for SharePoint search to pick up the update.
What this does
Making a small change to the SharePoint profile can help trigger SharePoint search to reprocess that profile and pick up updated information, such as the latest title.
Important note
-
This change is made in SharePoint User Profiles, not in Entra ID.
-
The refresh is not immediate, so allow up to 24 hours for the update to appear.