Top Navigation that’s hard to miss!
Standard Layout

Horizontal Layout

Key features:
- Set link description
- Set logo size, text size & colors, and background colors
- Use custom fonts
- Target links based on security groups
- Show the same navigation across sites
- Hide SharePoint site and hub navigation
- Select horizontal or vertical layout
Initial setup
Please follow this video for setup instructions
Configuring Origami Navigation on SharePoint Communication Site - Watch Video

Target links based on security groups
You can make it so navigation links are only shown to specific users based on permission groups.
Here is how you do that:
STEP 1: Setup the list
- Click [*] → Site contents
- Open the list called Navigation
- Click [*] → List settings
- Click Advanced settings as shown below
- Find the Folders setting and set the toggle to Yes as shown below
- Click Ok to save settings and go back to the Navigation list


Now you can create folders in the navigation list.
Each folder will become the top navigation label as shown below:

STEP 2: Move navigation items into respective folders
If you move navigation items into a folder, these items will show as child navigation items.
You can move items into folders by using drag & drop in the navigation list:

STEP 3: Setting folder permissions
Finally, to allow only specific navigation items to be seen by specific groups or users, simply set permissions on a folder or a list item as you’d normally do in SharePoint:
-
Click Manage access on a given item as shown below:
-
Grant access to a user or group, like this:
2. 3. 6. 7.


Show the same navigation across sites
You can make it so multiple modern SharePoint Sites show the same navigation without having to re-create it.
Here is how to set that up:
STEP 1: Follow the steps in the Initial setup sequence above to set up Origami navigation for your main site.
STEP 2: Enable Origami navigation app on all of the sites that will be sharing your main site navigation, let’s call them children sites. See Initial setup sequence on how to do that.
STEP 3: Point all of your children sites to read navigation from the main site by going to navigation settings and setting the option shown below to main site URL:

Click the check button next to URL to preview what your navigation will look like. If you’re happy with what you’re seeing, click Save.
Using custom fonts
![]() Available in Top Navigation – Version May 20, 2025
Available in Top Navigation – Version May 20, 2025
You can now have custom fonts for your top navigation labels:

To select your font, just got to navigation settings as choose the font you like form a picker:

If you’d like to upload your own custom font, select system-ui as a font in the Origami Top navigation and follow this tutorial to upload your own custom font to SharePoint:
How to customize SharePoint Theme & Fonts | 2024 Tutorial
Changing between horizontal/ vertical layouts
![]() Available in Top Navigation – Version Jul 9, 2025
Available in Top Navigation – Version Jul 9, 2025
You can now change the menu layout to horizontal if you have lots of links:
To select this option, go to Navigation settings and pick the suitable option as shown below:

Enabling breadcrumb
![]() Available in Top Navigation – Version Nov 12, 2025
Available in Top Navigation – Version Nov 12, 2025
In your intranet the breadcrumb shows just below the site header and shows the navigation path to the page you’re on:
Example:
Home › Company Resources › Forms & Templates › Pay adjustment request
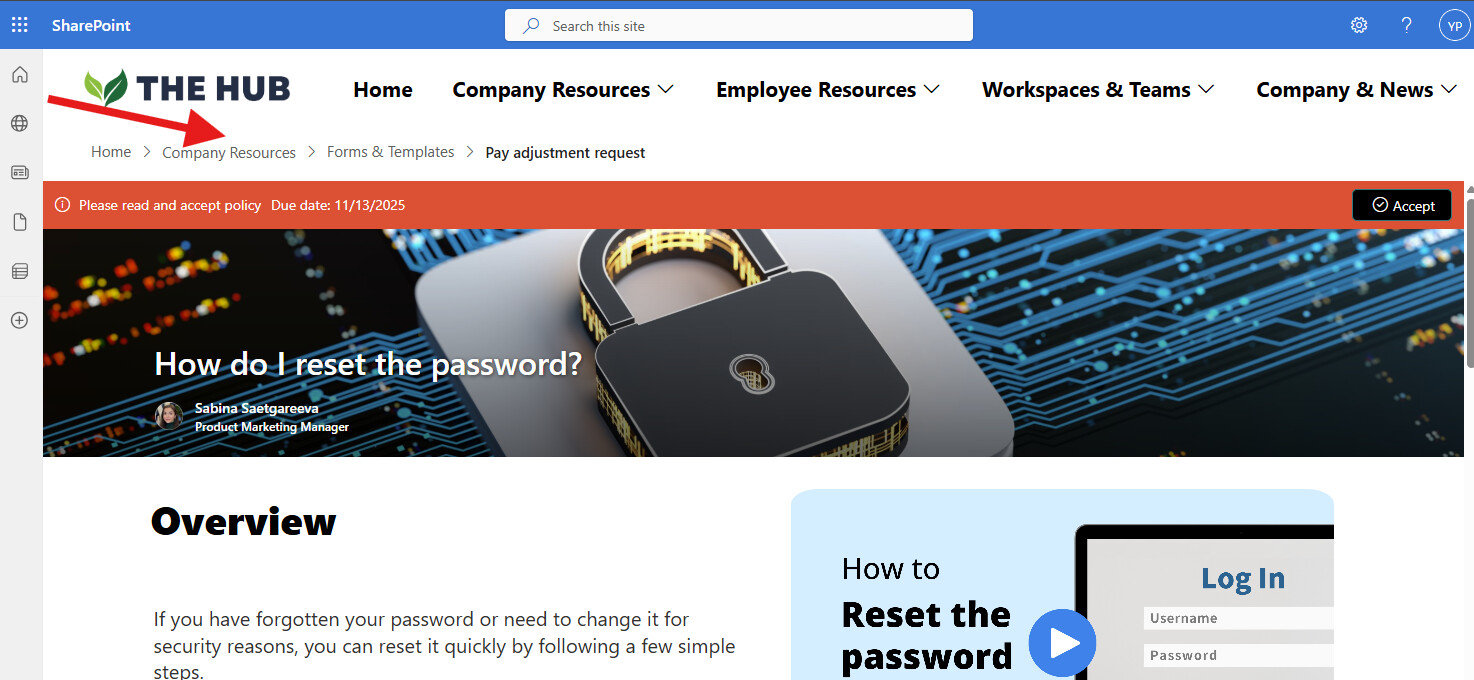
This helps users:
- Quickly understand which section they’re viewing
- Easily navigate back to a parent section (e.g., “Company Resources”) if the label has a landing page
- Stay oriented even after stepping away from the screen
To enable the breadcrumb site-wide, go to Navigation Settings and toggle “Show breadcrumb” as shown below:
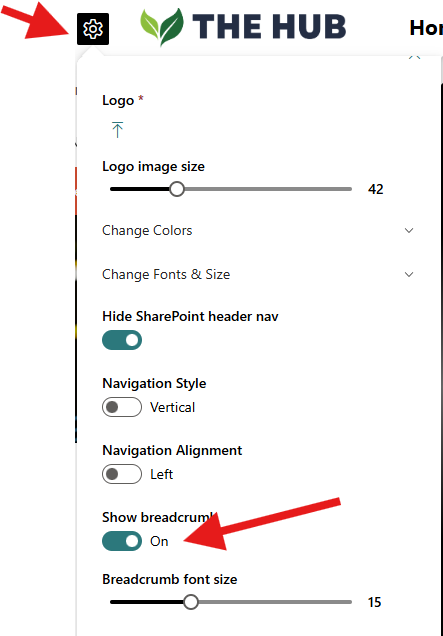
You can even adjust breadcrumb font size as you wish.
Troubleshooting
Uninstalling top navigation
Step 1: Remove the Origami Navigation App
- Click (*) → Site contents
- Find the app called Origami Navigation → (…) → Remove
- Click Return to classic SharePoint:

- Again find the app called Origami Navigation → (…) → Remove
- Click OK to confirm


Step 2: Remove the App from the Recycle Bin and Second-Stage Recycle Bin
-
While on the Site contents page click the Recycle bin link located in the top right hand corner

-
Find Origami Navigation from the list, select it and click Delete selection
-
Click (*) → Site settings
-
Click Recycle bin link and scroll all the way down to the bottom (footer) of the page until you see this text: “Can’t find what you’re looking for? Check the second-stage recycle bin”
-
Click the link second-stage recycle bin
-
Once more select Origami Navigation and click Delete selection. This permanently deletes Navigation from the site.


Step 3: Remove Stored Data
NOTE: ![]() With previous steps completed, the navigation is removed and won’t show on the site, but if you were to add the app again, it would read the navigation items and other settings you previously had. Those navigation items and settings are stored in the list called Navigation.
With previous steps completed, the navigation is removed and won’t show on the site, but if you were to add the app again, it would read the navigation items and other settings you previously had. Those navigation items and settings are stored in the list called Navigation.
To completely remove all navigation data:
- While on Site contents page, find the list called Navigation → (…) → Remove

This removes Origami Navigation and its settings (colors, logo, navigation items etc)