Here is how to install ORIGAMI solution for the first time in your Office 365 SharePoint tenant.
STEP 1: Upload ORIGAMI apps
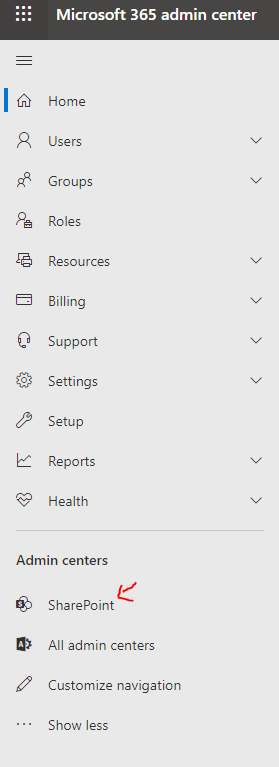
- Log in to your Office 365 admin center page with a SharePoint admin account, then choose Admin as shown below:

- Navigate to the SharePoint admin center shown below:
-
In the left-hand side navigation click on MoreFeatures.
-
From the list on the page, click the Apps button. This will open your SharePoint App Catalog.
-
Your Origami account manager sent you an installation package (about a dozen files with *.sppkg extension). Download these files to your computer and then upload each of them to the App Catalog, one by one.
-
For each of the files you upload, wait for the confirmation to come up.
-
When the confirmation window comes up, click Deploy or Enable button and wait for completion. Repeat steps 5-7 for each of the files in the package provided.
NOTE: After you enable some apps, you might be asked to [Set up an API permission]. This step can be skipped by clicking [I’ll do it later] button. Additional permissions can be given on as needed basis instead of upfront.
STEP 2: Test the apps
Try adding Staff Directory app to your page. If the app doesn’t load, please contact support to help you out.
----------- Unable to upload to your SharePoint App Catalog?
- Log in to your Office 365 admin center page with an administrator account, then choose Admin.
- Navigate to the SharePoint admin center.
-
In the left-hand side navigation click on the Sites → Active Sites link.
-
Search for the URL of your App Catalog.

-
Click on the title of the app catalog site.
-
In the flyout window, select the [Permissions] tab and add your username as an Admin in the list.
----------- Optional site configuration for legacy apps
If you’re using an installation package released prior to June 2023, you’ll need to do these additional installation steps.
- Navigate to the site which will be your intranet home page.
- Create a new list Custom List and give it a name [Config].
Here is how to create a SharePoint list → https://support.microsoft.com/en-us/office/create-a-list-0d397414-d95f-41eb-addd-5e6eff41b083 - Add a new list column called [Value]. The type of the column should be a Single line of text
- The minimum values required in the list are:
4.1 Title: PrimaryColour Value: [hex of your primary color; example: #385d7f]
4.2 Title: SecondaryColour Value: [hex of your secondary color; example: #e18719]
4.3 Title: origamirootsiteindicatorkey2019 Value: origamirootsiteindicatorkey2019