This App keeps major news, announcements and events at your fingertips.
NOTE: This app uses caching to improve the speed of load. New items and updates take 20 minutes to show up in the web part.
Setting up the web part
On the site where you need the web part:
- Access Site Pages library settings.
- Add the following columns:
2.1 NewsType [choice field]. Add 3 options to this choice field: ‘Carousel’, ‘Featured’, and ‘None’.
2.2 StartDate [DateOnly]
2.3 EndDate [DateOnly]
2.4 DisplayOrder [Number]
2.5 OfficeSegment [choice field]. Add one option to this choice field called: ‘Everyone’.
Add the following web part to the page where you’d like the Featured News web part to appear:

NOTE: The web part is not supported in the Full-Width section.
Creating a new post / managing news
To create or manage news, be sure you have Add/Edit permissions on the site.
Click [Manage All News] at the bottom of the app on the homepage.

You will be taken to the News Publication Dashboard.
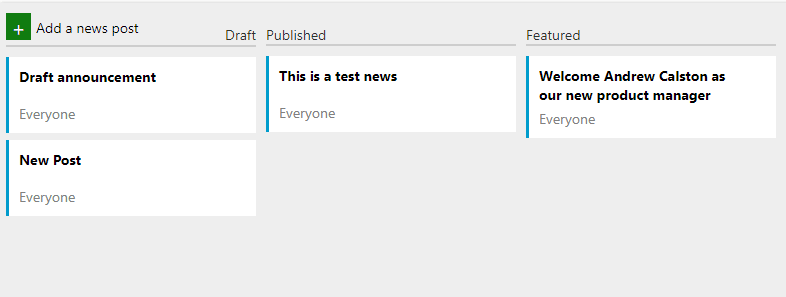
- Click the [Add a news post +] button
- Enter the title of the news in the [Name your news post] section
- Provide a header image for the news.
-For Carousel news, the optimal image size is 540(width) x 340 (height)
-For Featured news, the optimal size image is 180(width) x 100 (height)

- Add a Text widget or other apps to the page body to create the desired format.

- If you like the news to be featured in the home page carousel, select Page Details in the header, as shown below:

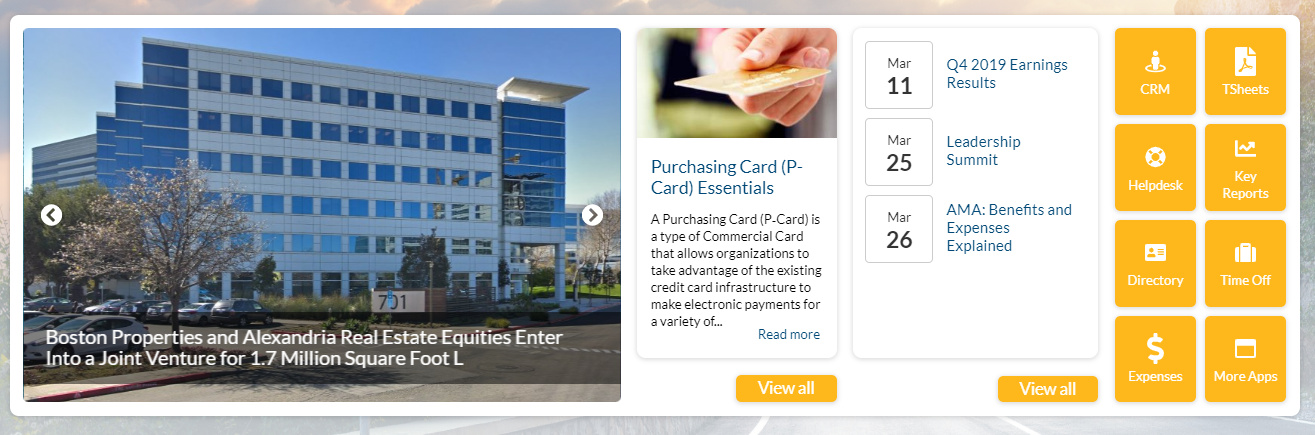
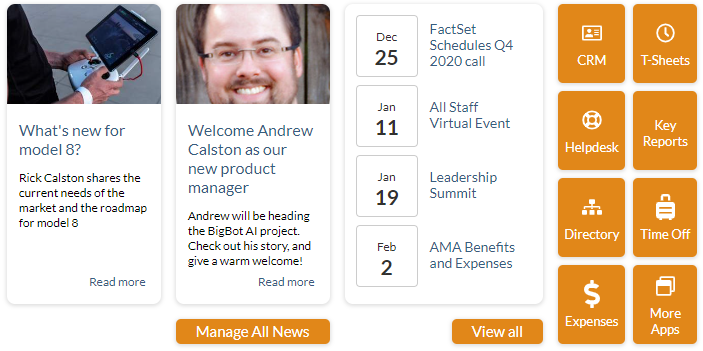
There are 2 news item sizes/formats: [Carousel] and [Featured].
[Carousel] format will appear in the rotating carousel.
[Featured] will always look to the right of the carousel.
You can switch between them anytime.
In the right-hand side panel, under [Properties] → [News Type] select: [Carousel] or [Featured] depending on the preferences:

NOTE: You must provide a Description of the [News Type] is [Featured] or [Carousel].

NOTE: If the [News Type] is left as [None], the news will not show up on the home page but will be visible when the user clicks the [View All] link on the news app.
- If you’re ready to post this page for everyone, click the [Post news] button in the right-hand corner of the page.
If you’d like to leave this post as a Draft, click the [Save draft] button. You can easily get to your drafts from the [Manage All News] page, from which you can publish them at any time.
Creating MS Teams events that can be added to employee calendar
You can create an MS Teams meeting/event that will show in the events carousel on your SharePoint intranet homepage and at the same time will allow employees to add this event to their calendar.
Here is how to set this up:
-
First, in your Outlook, set up a regular MS Teams meeting for when you’d like this event to take place. If this is a townhall or a panel, you can invite your panellists, but the rest of the company employees, that part comes next.

-
Copy the MS Teams meeting URL (“Click to join” link from the email above)
-
Navigate to your intranet homepage and click View all under events i the carousel

-
Click Add event and add the link you copied in step 2 into the link address as highlighted below
-
Add the rest of the details as you see fit and click Save.
NOTE: Make the Title of the event descriptive, that’s the title that will show in the Outlook calendar for empopyees later.

Employees will be able to join the event from the newly created event page or save it in their calendar:

If an employee chooses to save the event to their Outlook, here is how it will show for them later when it’s time to join the event:

NOTE:
Currently, the events created this way don’t have a standard 15 min reminder. You might want to send a reminder manually. We’re hoping Microsoft will fix this issue soon.
Managing which news show on the home page
From the [Manage All News] page, you can do the following:
- See all posts and where they show
- Publish, Archive, and Delete any post (see GIF below)
- Set posts as Featured or Carousel

Hide author name from news carousel
Carousel news authors can be hidden for all carousel stories by enabling [Hide Authors] option in the Header App properties. You will need to save and reload the page to see the authors hidden.

Hide events from the news carousel
You can choose to show or hide the events panel in Origami news carousel.
With events:
Without events:

To set this preference, you need to access the webpart properties, and switch the toggle a needed

When events are hidden, any additional space will be given away to other parts of the carousel making them appear bigger.
Changing where View All buttons point to

-
Access news app properties
-
Both links can be specified in the properties the following way:

Switching Quick Links for another set of links
You can point Quick Link in the Featured News app to point to a different set of links without deleting the original set. This can help you maintain an alternative set of links without deleting the original ones.
Here are the steps to set this up:
-
Make a copy of the Quick Links list from the existing one as described in this post: Make a copy of FAQ or Quick Links list
-
Add new Quick Links content to the newly created list
-
In the properties of the Featured News app select the new list you have just created:

- Save the page and refresh it to see the quick links being pulled from a separate list
Advanced: Initial setup of targeting of news items based on the specific user profile property
You can choose to show news posts in the news carousel only to users with a specific user profile property value.
For example: If you track Division for your users, you may want to show news for a specific division only to users in that division.
To set this up you will need Sharepoint Admin rights.
If you do, follow these steps:
-
Determine the user profile property name you will be matching your users against. Example: Division
-
Navigate to https://[your_tenant]-admin.sharepoint.com/_layouts/15/TenantProfileAdmin/MgrProperty.aspx?ProfileType=User
-
Find the property in the list (Ex. Division) and click [Edit] to open its details.
-
Get the property name as highlighted. Note that property name may be different from the Display Name. We’ll need that name in step 10.

-
Navigate back to your intranet home [*] → Site content → Site Pages → Settings
-
Click on the OfficeSegment column to access its details.
-
Specify all of the values that can be available.
This is for authors to select from when creating news pages.
Be sure to leave Everyone in that list so authors can create items for everybody. Here is an example:

-
Click OK to save changes.
-
Navigate to the homepage where you have your news carousel and edit the page.
-
Access the web part properties and enter the value you copied in Step 4 into the
Filter by User Profile Attribute

- Save the page
Anything unclear or doesn’t work?
Post your question or comment here